
Upgrading from the previous version? Use a Migration Guide.
Nuke provides a simple and efficient way to download and display images in your app. Behind its clear and concise API is an advanced architecture which enables its unique features and offers virtually unlimited possibilities for customization.
Fast LRU memory and disk cache · SwiftUI · Smart background decompression · Image processing · Elegant builder API · Resumable downloads · Intelligent deduplication · Request prioritization · Low data mode · Prefetching · Rate limiting · Progressive JPEG, HEIF, WebP, SVG, GIF · Alamofire · Combine · Reactive extensions
Documentation for the latest stable version (Nuke 8.4.1) can be found here.
Nuke is easy to learn and use. Here is an overview of its APIs and features:
ImageRequestResize · Circle · RoundedCorners · GaussianBlur · CoreImageFilter · Custom ProcessorsImageTask · Customize Image Pipeline · Default PipelineTo learn more see a full API Reference, and check out the demo project included in the repo. When you are ready to install, follow the Installation Guide. See Requirements for a list of supported platforms. If you encounter any issues, the Troubleshooting Guide might help.
To learn more about the pipeline and the supported formats, see the dedicated guides.
If you'd like to contribute to Nuke see Contributing.
Download and display an image in an image view with a single line of code:
Nuke.loadImage(with: url, into: imageView)Nuke will check if the image exists in the memory cache, and if it does, will instantly display it. If not, the image data will be loaded, decoded, processed, and decompressed in the background.
See Image Pipeline Guide to learn how images are downloaded and processed.
When you request a new image for the existing view, Nuke will prepare it for reuse and cancel any outstanding requests for the view.
func tableView(_ tableView: UITableView, cellForItemAt indexPath: IndexPaths) -> UITableViewCell {
    /* Create a cell ... */
    Nuke.loadImage(with: url, into: cell.imageView)
}
When the view is deallocated, an associated request gets canceled automatically. To manually cancel the request, call
Nuke.cancelRequest(for: imageView).
Use ImageLoadingOptions to set a placeholder, select one of the built-in transitions, or provide a custom one.
let options = ImageLoadingOptions(
    placeholder: UIImage(named: "placeholder"),
    transition: .fadeIn(duration: 0.33)
)
Nuke.loadImage(with: url, options: options, into: imageView)
You can even customize content modes per image type:
let options = ImageLoadingOptions(
    placeholder: UIImage(named: "placeholder"),
    failureImage: UIImage(named: "failureImage"),
    contentModes: .init(success: .scaleAspectFill, failure: .center, placeholder: .center)
)
In case you want all image views to have the same behavior, you can modify
ImageLoadingOptions.shared.
Please keep in mind that the built-in extensions for image views are designed to get you up and running as quickly as possible. If you want to have more control, or use some of the advanced features, like animated images, it is recommended to use ImagePipeline directly in your custom views.
ImageRequestImageRequest allows you to set image processors, change the request priority and more:
let request = ImageRequest(
    url: URL(string: "http://..."),
    processors: [ImageProcessors.Resize(size: imageView.bounds.size)],
    priority: .high
)
Another way to apply processors is by setting the default
processorsonImagePipeline.Configuration. These processors will be applied to all images loaded by the pipeline. If the request has a non-empty array ofprocessors, they are going to be applied instead.
The advanced options available via ImageRequestOptions. For example, you can provide a filteredURL to be used as a key for caching in case the URL contains transient query parameters.
let request = ImageRequest(
    url: URL(string: "http://example.com/image.jpeg?token=123")!,
    options: ImageRequestOptions(
        filteredURL: "http://example.com/image.jpeg"
    )
)
There are more options available, to see all of them check the inline documentation for
ImageRequestOptions.

Nuke features a powerful and efficient image processing infrastructure with multiple built-in processors which you can find in ImageProcessors namespace, e.g. ImageProcessors.Resize.
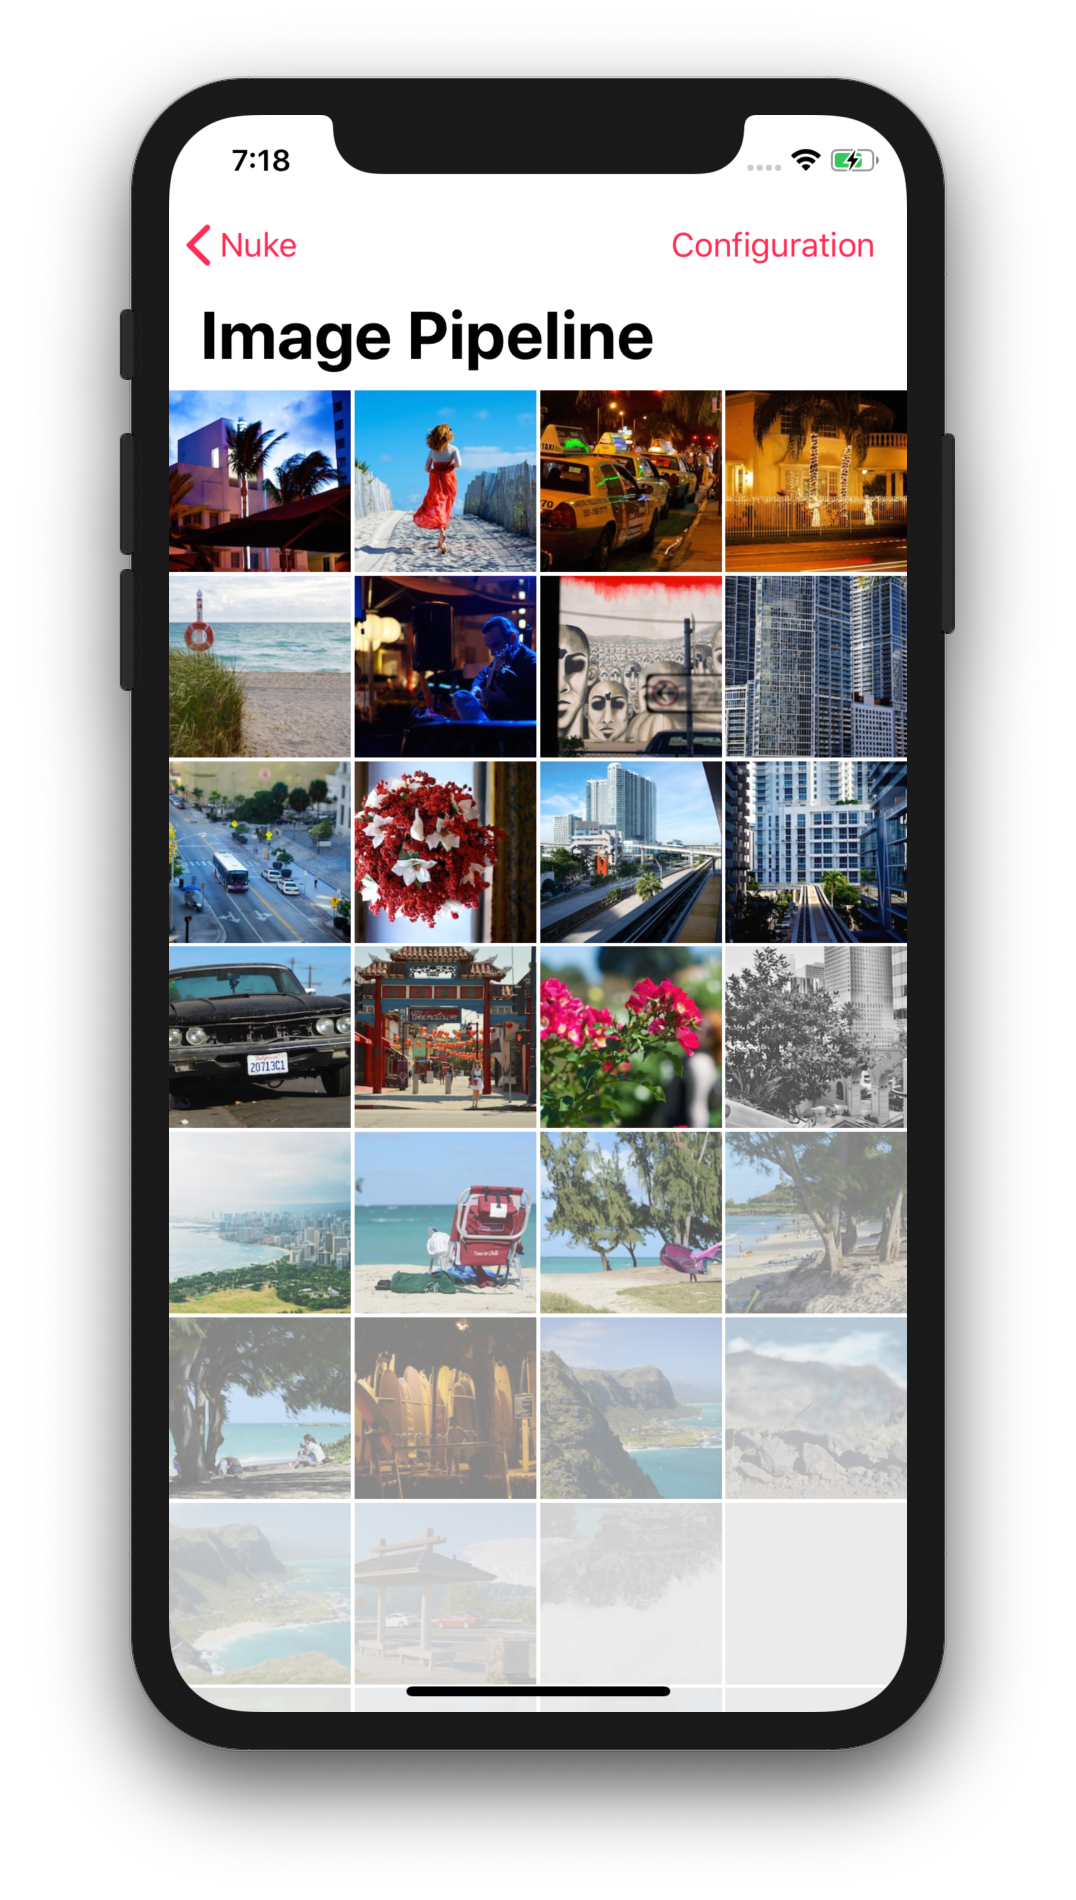
This and other screenshots are from the demo project included in the repo.
ResizeTo resize an image, use ImageProcessors.Resize:
ImageRequest(url: url, processors: [
    ImageProcessors.Resize(size: imageView.bounds.size)
])
By default, the target size is in points. When the image is loaded, Nuke will downscale it to fill the target area maintaining the aspect ratio. To crop the image set crop to true. For more options, see ImageProcessors.Resize documentation.
Use an optional Builder package for a more concise API.
pipeline.image(with: URL(string: "https://")!)
    .resize(width: 320)
    .blur(radius: 10)
CircleRounds the corners of an image into a circle with an optional border.
ImageRequest(url: url, processors: [
    ImageProcessors.Circle()
])RoundedCornersRounds the corners of an image to the specified radius. Make sure you resize the image to exactly match the size of the view in which it gets displayed so that the border appears correctly.
ImageRequest(url: url, processors: [
    ImageProcessors.Circle(radius: 16)
])GaussianBlurImageProcessors.GaussianBlur blurs the input image using one of the Core Image filters.
CoreImageFilterApply any of the vast number Core Image filters using ImageProcessors.CoreImageFilter:
ImageProcessors.CoreImageFilter(name: "CISepiaTone")For simple one-off operations, use ImageProcessors.Anonymous to create a processor with a closure.
Custom processors need to implement ImageProcessing protocol. For the basic image processing needs, implement process(_:) method and create an identifier which uniquely identifies the processor. For processors with no input parameters, you can return a static string.
public protocol ImageProcessing {
    func process(image: UIImage) -> UIImage? // NSImage on macOS
    var identifier: String { get }
}
If your processor needs to manipulate image metadata (ImageContainer), or get access to more information via ImageProcessingContext, there is an additional method that you can implement in addition to process(_:).
public protocol ImageProcessing {
    func process(_ image container: ImageContainer, context: ImageProcessingContext) -> ImageContainer?
}
In addition to var identfier: String, you can implement var hashableIdentifier: AnyHashable to be used by the memory cache where string manipulations would be too slow. By default, this method returns the identifier string. A common approach is to make your processor Hashable and return self from hashableIdentifier.
At the core of Nuke is the ImagePipeline class. Use the pipeline directly to load images without displaying them:
let task = ImagePipeline.shared.loadImage(
    with: url,
    progress: { _, completed, total in
        print("progress updated")
    },
    completion: { result: Result<ImageResponse, ImagePipeline.Error> in
        print("task completed")
    }
)
To download the data without doing any expensive decoding or processing, use
loadData(with:progress:completion:).
ImageTaskWhen you start the request, the pipeline returns an ImageTask object, which can be used for cancellation and more.
task.cancel()
task.priority = .highIf you want to build a system that fits your specific needs, you won't be disappointed. There are a lot of things to tweak. You can set custom data loaders and caches, configure image encoders and decoders, change the number of concurrent operations for each individual stage, disable and enable features like deduplication and rate limiting, and more.
To learn more see the inline documentation for
ImagePipeline.Configurationand Image Pipeline Guide.
Here are the protocols which can be used for customization:
DataLoading – Download (or return cached) image dataDataCaching – Store image data on diskImageDecoding – Convert data into images (see _ImageDecoding for new experimental decoding features)ImageEncoding - Convert images into dataImageProcessing – Apply image transformationsImageCaching – Store images into a memory cacheThe entire configuration is described by the ImagePipeline.Configuration struct. To create a pipeline with a custom configuration either call the ImagePipeline(configuration:) initializer or use the convenience one:
let pipeline = ImagePipeline {
    $0.dataLoader = ...
    $0.dataLoadingQueue = ...
    $0.imageCache = ...
    ...
}
And then set the new pipeline as default:
ImagePipeline.shared = pipelineThe default image pipeline is initialized with the following dependencies:
// Shared image cache with a size limit of ~20% of available RAM.
imageCache = ImageCache.shared

// Data loader with a default `URLSessionConfiguration` and a custom `URLCache`
// with memory capacity 0, and disk capacity 150 MB.
dataLoader = DataLoader()

// Custom aggressive disk cache is disabled by default.
dataCache = nil

// By default uses the decoder from the global registry and the default encoder.
makeImageDecoder = ImageDecoderRegistry.shared.decoder(for:)
makeImageEncoder = { _ in ImageEncoders.Default() }
Each operation in the pipeline runs on a dedicated queue:
dataLoadingQueue.maxConcurrentOperationCount = 6
dataCachingQueue.maxConcurrentOperationCount = 2
imageDecodingQueue.maxConcurrentOperationCount = 1
imageEncodingQueue.maxConcurrentOperationCount = 1
imageProcessingQueue.maxConcurrentOperationCount = 2
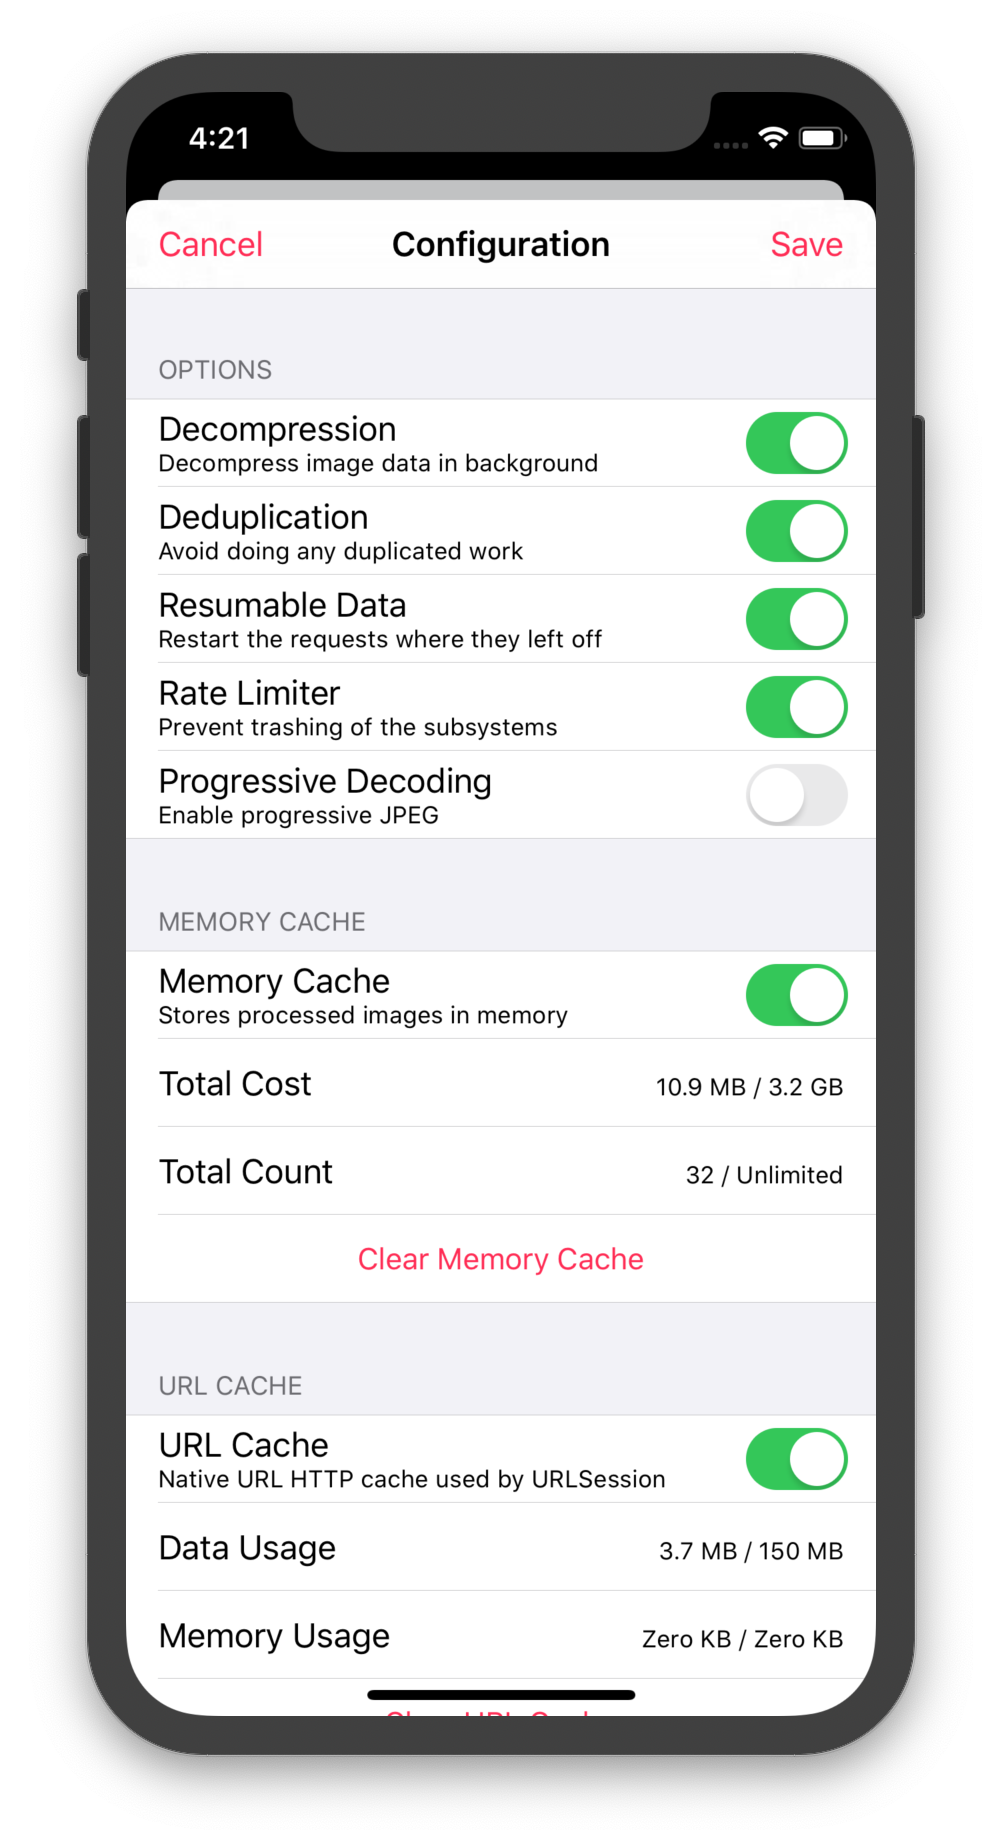
imageDecompressingQueue.maxConcurrentOperationCount = 2There is a list of pipeline settings which you can tweak:
// Automatically decompress images in the background by default.
isDecompressionEnabled = true

// Configure what content to store in the custom disk cache.
dataCacheOptions.storedItems = [.finalImage] // [.originalImageData]

// Avoid doing any duplicated work when loading or processing images.
isDeduplicationEnabled = true

// Rate limit the requests to prevent trashing of the subsystems.
isRateLimiterEnabled = true

// Progressive decoding is an opt-in feature because it is resource intensive.
isProgressiveDecodingEnabled = false

// Don't store progressive previews in memory cache.
$0.isStoringPreviewsInMemoryCache = false

// If the data task is terminated (either because of a failure or a
// cancellation) and the image was partially loaded, the next load will
// resume where it was left off.
isResumableDataEnabled = true
And also a few global options shared between all pipelines:
// Enable to start using `os_signpost` to monitor the pipeline
// performance using Instruments.
ImagePipeline.Configuration.isSignpostLoggingEnabled = falseNuke's default ImagePipeline has two cache layers.
First, there is a memory cache for storing processed images which are ready for display.
// Configure cache
ImageCache.shared.costLimit = 1024 * 1024 * 100 // 100 MB
ImageCache.shared.countLimit = 100
ImageCache.shared.ttl = 120 // Invalidate image after 120 sec

// Read and write images
let request = ImageRequest(url: url)
ImageCache.shared[request] = ImageContainer(image: image)
let image = ImageCache.shared[request]

// Clear cache
ImageCache.shared.removeAll()
ImageCache uses the LRU algorithm – least recently used entries are removed first during the sweep.
Unprocessed image data is stored with URLCache.
// Configure cache
DataLoader.sharedUrlCache.diskCapacity = 100
DataLoader.sharedUrlCache.memoryCapacity = 0

// Read and write responses
let request = ImageRequest(url: url)
let _ = DataLoader.sharedUrlCache.cachedResponse(for: request.urlRequest)
DataLoader.sharedUrlCache.removeCachedResponse(for: request.urlRequest)

// Clear cache
DataLoader.sharedUrlCache.removeAllCachedResponses()If HTTP caching is not your cup of tea, you can try using a custom LRU disk cache for fast and reliable aggressive data caching (ignores HTTP cache control). You can enable it using the pipeline configuration.
ImagePipeline {
    $0.dataCache = try? DataCache(name: "com.myapp.datacache")

    // Also consider disabling the native HTTP cache, see `DataLoader`.
}
By default, the pipeline stores only the original image data. To store downloaded and processed images instead, set dataCacheOptions.storedItems to [.finalImage]. This option is useful if you want to store processed, e.g. downsampled images, or if you want to transcode images to a more efficient format, like HEIF.
To save disk space see
ImageEncoders.ImageIOandImageEncoder.isHEIFPreferredoption for HEIF support.
Prefetching images in advance can dramatically improve your app's user experience.
// Make sure to keep a strong reference to preheater.
let preheater = ImagePreheater()

preheater.startPreheating(with: urls)

// Cancels all of the preheating tasks created for the given requests.
preheater.stopPreheating(with: urls)
Keep in mind that prefetching takes up users' data and puts extra pressure on CPU and memory. To reduce the CPU and memory usage, you have an option to choose only the disk cache as a prefetching destination:
// The preheater with `.diskCache` destination will skip image data decoding
// entirely to reduce CPU and memory usage. It will still load the image data
// and store it in disk caches to be used later.
let preheater = ImagePreheater(destination: .diskCache)
On iOS, you can use prefetching APIs in combination with
ImagePreheaterto automate the process.
To enable progressive image decoding set isProgressiveDecodingEnabled configuration option to true.

let pipeline = ImagePipeline {
    $0.isProgressiveDecodingEnabled = true

    // If `true`, the pipeline will store all of the progressively generated previews
    // in the memory cache. All of the previews have `isPreview` flag set to `true`.
    $0.isStoringPreviewsInMemoryCache = true
}
And that's it, the pipeline will automatically do the right thing and deliver the progressive scans via progress closure as they arrive:
let imageView = UIImageView()
let task = ImagePipeline.shared.loadImage(
    with: url,
    progress: { response, _, _ in
        if let response = response {
            imageView.image = response.image
        }
    },
    completion: { result in
        // Display the final image
    }
)There is a variety of extensions available for Nuke:
| Name | Description |
|---|---|
| FetchImage | SwiftUI integration |
| ImagePublisher | Combine publishers for Nuke |
| ImageTaskBuilder | A fun and convenient way to use Nuke |
| Alamofire Plugin | Replace networking layer with Alamofire and combine the power of both frameworks |
| RxNuke | RxSwift extensions for Nuke with examples of common use cases solved by Rx |
| WebP Plugin | [Community] WebP support, built by Ryo Kosuge |
| Gifu Plugin | Use Gifu to load and display animated GIFs |
| FLAnimatedImage Plugin | Use FLAnimatedImage to load and display animated GIFs |
| Xamarin NuGet | [Community] Makes it possible to use Nuke from Xamarin |
FetchImageFetchImage is a Swift package that makes it easy to download images using Nuke and display them in SwiftUI apps. For more info, see the introductory post.
Note: This is an API preview, it might change in the future.
public struct ImageView: View {
    @ObservedObject var image: FetchImage

    public var body: some View {
        ZStack {
            Rectangle().fill(Color.gray)
            image.view?
                .resizable()
                .aspectRatio(contentMode: .fill)
        }
    }
}
Low Data Mode
FetchImage also offers built-in support for low-data mode via a special initializer:
FetchImage(regularUrl: highQualityUrl, lowDataUrl: lowQualityUrl)Find the default API a bit boring? Try ImageTaskBuilder, a fun and convenient way to use Nuke.
ImagePipeline.shared.image(with: URL(string: "https://")!)
    .fill(width: 320)
    .blur(radius: 10)
    .priority(.high)
    .start { result in
        print(result)
    }

// Returns `ImageTask` when started.
let imageView: UIImageView
ImagePipeline.shared.image(with: URL(string: "https://")!)
.fill(width: imageView.size.width)
.display(in: imageView)RxNuke adds RxSwift extensions for Nuke and enables common use cases: Going from low to high resolution | Loading the first available image | Showing stale image while validating it | Load multiple images, display all at once | Auto retry on failures | And more
To get a taste of what you can do with this extension, take a look at how easy it is to load the low resolution image first and then switch to high resolution:
let pipeline = ImagePipeline.shared
Observable.concat(pipeline.loadImage(with: lowResUrl).orEmpty,
                  pipeline.loadImage(with: highResUrl).orEmpty)
    .subscribe(onNext: { imageView.image = $0 })
.disposed(by: disposeBag)ImagePublisher adds Combine publishers for Nuke and, just like RxNuke, enables a variety of powerful use cases.
Nuke's roadmap is managed in Trello and is publicly available. If you'd like to contribute, please feel free to create a PR.
| Nuke | Swift | Xcode | Platforms |
|---|---|---|---|
| Nuke 9.0 | Swift 5.1 | Xcode 11.0 | iOS 11.0 / watchOS 4.0 / macOS 10.13 / tvOS 11.0 |
| Nuke 8.0 | Swift 5.0 | Xcode 10.2 | iOS 10.0 / watchOS 3.0 / macOS 10.12 / tvOS 10.0 |
See Installation Guide for information about the older versions.
Nuke is available under the MIT license. See the LICENSE file for more info.